目标
在本教程中,我们将讨论三个 Bootstrap 3 的 class 来为图像添加样式。同时,我们也会讨论有关 Bootstrap 3 为响应式图像所提供的内容。
一般的样式
在我们讨论 Bootstrap 3 提供的定义图像样式的特殊的 class 之前,我们将看到 Bootstrap 3 提供的定义图像的一般的样式。
img {
  border: 0;
}
这是在 Bootstrap 3 的 CSS 中找到的第一个为图像定义的 CSS 规则,当图像呈现时用来移除边框。
然后,在打印的媒体查询内,规定了这些规则。
 img {
    page-break-inside: avoid;
  }
  img {
    max-width: 100% !important;
  }
page-break-inside: avoid; 避免图像内的分页符。
max-width: 100% !important; 为图像定义的样式是显而易见的。这里它用于确定即使图像的宽度超出了容器,它也能被限制在容器内显示。它与 !important 一起使用,来覆盖其他任何破坏这种样式的样式。有时候,开发人员想让样式更好地支持移动设备上图像的友好呈现,会特别使用这两个规则。
这里还有另一个用于图像的规则
img {
  vertical-align: middle;
}
由于这条规则,一个图像会在 div 或者其他元素内垂直居中。如下面实例所示。
<!DOCTYPE html>
<html>
  <head>
    <title>example of rendering images in Bootstrap 3</title>
    <meta name="viewport" content="width=device-width, initial-scale=1.0">
    <!-- Bootstrap -->
    <link href="dist/css/bootstrap.min.css" rel="stylesheet" media="screen">
    <style>
    body {
    padding: 50px
    }
     .mdl {
     background-color: silver;
     padding: 7px
    }
    </style>
    <!-- HTML5 Shim and Respond.js IE8 support of HTML5 elements and media queries -->
    <!-- WARNING: Respond.js doesn't work if you view the page via file:// -->
    <!--[if lt IE 9]>
      <script src="https://oss.maxcdn.com/libs/html5shiv/3.7.0/html5shiv.js"></script>
      <script src="https://oss.maxcdn.com/libs/respond.js/1.3.0/respond.min.js"></script>
    <![endif]-->
  </head>
  <body>
<p class="mdl"><img src="icon-default-screenshot.png">Lorem ipsum dolor sit amet, consectetuer adipiscing elit, sed diam nonummy nibh euismod tincidunt ut laoreet dolore magna aliquam erat volutpat.</p>
<!-- jQuery (necessary for Bootstrap's JavaScript plugins) -->
    <script src="https://code.jquery.com/jquery.js"></script>
    <!-- Include all compiled plugins (below), or include individual files as needed -->
    <script src="dist/js/bootstrap.min.js"></script>
  </body>
</html>
请注意,如果需要根据上下文垂直居中图像,则需要额外的样式。
特殊的样式
Bootstrap 3 提供了三个 class 用于呈现带有明确样式的图像。
img-rounded
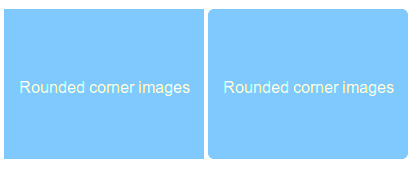
您可以使用这个 class 来呈现带有圆角的图像。为了实现这点,Bootstrap 提供了 img-rounded class。该 class 的样式如下定义
.img-rounded {
  border-radius: 6px;
}
所以,它把 border-radius 属性设置为带有 6 像素值,用来定义相关图像的圆角。下面的实例演示了两个相同的图像,第一个图像不带 img-rounded class,第二个图像带有 img-rounded class。请注意,第二个图像是圆角的。您可以 点击这里,在线查看实例。

<!DOCTYPE html>
<html>
  <head>
    <title>example of rendering images with rounded corners with Bootstrap 3</title>
    <meta name="viewport" content="width=device-width, initial-scale=1.0">
    <!-- Bootstrap -->
    <link href="dist/css/bootstrap.min.css" rel="stylesheet" media="screen">
    <style>
    body {
    padding: 50px
    }
    </style>
    <!-- HTML5 Shim and Respond.js IE8 support of HTML5 elements and media queries -->
    <!-- WARNING: Respond.js doesn't work if you view the page via file:// -->
    <!--[if lt IE 9]>
      <script src="https://oss.maxcdn.com/libs/html5shiv/3.7.0/html5shiv.js"></script>
      <script src="https://oss.maxcdn.com/libs/respond.js/1.3.0/respond.min.js"></script>
    <![endif]-->
  </head>
  <body>
<img src="rounded-corner-images.png" alt="image with rounded corners">
<img src="rounded-corner-images.png" alt="image with rounded corners" class="img-rounded">
<!-- jQuery (necessary for Bootstrap's JavaScript plugins) -->
    <script src="https://code.jquery.com/jquery.js"></script>
    <!-- Include all compiled plugins (below), or include individual files as needed -->
    <script src="dist/js/bootstrap.min.js"></script>
  </body>
</html>
img-thumbnail
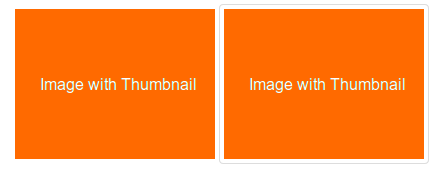
这是另一个 Bootstrap 3 的 CSS class,它给图像添加了一个缩略图。该 class 的代码显示如下
.img-thumbnail {
  display: inline-block;
  height: auto;
  max-width: 100%;
  padding: 4px;
  line-height: 1.428571429;
  background-color: #ffffff;
  border: 1px solid #dddddd;
  border-radius: 4px;
  -webkit-transition: all 0.2s ease-in-out;
          transition: all 0.2s ease-in-out;
}
下面是一个使用了该 class 的实例。您可以 点击这里,查看在线演示。

<!DOCTYPE html>
<html>
  <head>
    <title>Images thumbnail with Bootstrap 3</title>
    <meta name="viewport" content="width=device-width, initial-scale=1.0">
    <!-- Bootstrap -->
    <link href="dist/css/bootstrap.min.css" rel="stylesheet" media="screen">
    <style>
    body {
    padding: 50px
    }
    </style>
    <!-- HTML5 Shim and Respond.js IE8 support of HTML5 elements and media queries -->
    <!-- WARNING: Respond.js doesn't work if you view the page via file:// -->
    <!--[if lt IE 9]>
      <script src="https://oss.maxcdn.com/libs/html5shiv/3.7.0/html5shiv.js"></script>
      <script src="https://oss.maxcdn.com/libs/respond.js/1.3.0/respond.min.js"></script>
    <![endif]-->
  </head>
  <body>
<img src="image-with-thumbnail.png" alt="image without thumbnail corners">
<img src="image-with-thumbnail.png" alt="image with thumbnail corners" class="img-thumbnail">
<!-- jQuery (necessary for Bootstrap's JavaScript plugins) -->
    <script src="https://code.jquery.com/jquery.js"></script>
    <!-- Include all compiled plugins (below), or include individual files as needed -->
    <script src="dist/js/bootstrap.min.js"></script>
  </body>
</html>
img-circle
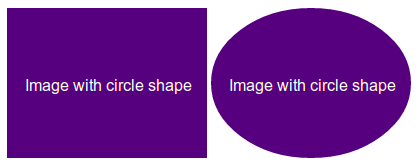
通过使用 border-radius 属性,Bootstrap 3 创建了一个以圆形呈现的图像。img-circle class 的 CSS 代码如下
.img-circle {
  border-radius: 50%;
}
点击这里,在线查看实例。下面是截屏和代码。

<!DOCTYPE html>
<html>
  <head>
    <title>Images with circle with Bootstrap 3</title>
    <meta name="viewport" content="width=device-width, initial-scale=1.0">
    <!-- Bootstrap -->
    <link href="dist/css/bootstrap.min.css" rel="stylesheet" media="screen">
    <style>
    body {
    padding: 50px
    }
    </style>
    <!-- HTML5 Shim and Respond.js IE8 support of HTML5 elements and media queries -->
    <!-- WARNING: Respond.js doesn't work if you view the page via file:// -->
    <!--[if lt IE 9]>
      <script src="https://oss.maxcdn.com/libs/html5shiv/3.7.0/html5shiv.js"></script>
      <script src="https://oss.maxcdn.com/libs/respond.js/1.3.0/respond.min.js"></script>
    <![endif]-->
  </head>
  <body>
<img src="image-with-circle.png" alt="image without circle shape">
<img src="image-with-circle.png" alt="image with circle shape" class="img-circle">
<!-- jQuery (necessary for Bootstrap's JavaScript plugins) -->
    <script src="https://code.jquery.com/jquery.js"></script>
    <!-- Include all compiled plugins (below), or include individual files as needed -->
    <script src="dist/js/bootstrap.min.js"></script>
  </body>
</html>
响应式图像
Bootstrap 3 没有提供立即可用的响应式图像。您必须添加 img-responsive class 到图像上让它具有响应性。该 class 的 CSS 代码如下。
.img-responsive {
  display: block;
  height: auto;
  max-width: 100%;
}
它定义了图像必须显示为块级元素,高度将与图像高度相同,图像的最大宽度是 100%,来限制图像根据它所在的设备来呈现。
如需让图像默认具有响应特性,您可以添加这些 CSS 代码到 img{ }。
使用该 class 的实例如下。您可以 点击这里,在线查看演示。
<!DOCTYPE html>
<html>
  <head>
    <title>Responsive image example with Bootstrap 3</title>
    <meta name="viewport" content="width=device-width, initial-scale=1.0">
    <!-- Bootstrap -->
    <link href="dist/css/bootstrap.min.css" rel="stylesheet" media="screen">
    <style>
    body {
    padding: 50px
    }
    img {
    margin-bottom:30px
    }
    </style>
    <!-- HTML5 Shim and Respond.js IE8 support of HTML5 elements and media queries -->
    <!-- WARNING: Respond.js doesn't work if you view the page via file:// -->
    <!--[if lt IE 9]>
      <script src="https://oss.maxcdn.com/libs/html5shiv/3.7.0/html5shiv.js"></script>
      <script src="https://oss.maxcdn.com/libs/respond.js/1.3.0/respond.min.js"></script>
    <![endif]-->
  </head>
  <body>
<img src="image-with-circle.png" alt="without responsive image feature">
<img src="image-with-circle.png" alt="with responsive image feature" class="img-responsive">
<!-- jQuery (necessary for Bootstrap's JavaScript plugins) -->
    <script src="https://code.jquery.com/jquery.js"></script>
    <!-- Include all compiled plugins (below), or include individual files as needed -->
    <script src="dist/js/bootstrap.min.js"></script>
  </body>
</html>
这个向图像添加响应特性的方法有局限性。
分别在大屏幕设备和移动设备(屏幕尺寸更小,可能会引发性能问题)上加载同样大的高分辨率的图像。由于浏览器会在 CSS 和 JS 加载之前预先加载图像,在一个低速的网络连接中,也会引发性能问题。试想一下,您有一个大图像和其内的一个特定对象,当您在移动设备上查看图像时,图像会被缩小到一个较小的版本,这样图像看起来就会很小,简称 艺术指导 问题。
开发人员已经想出克服这些限制的解决方案。我们将看到一个 Marc Grabanski 和 Christopher Schmitt 使用 HiSRC 的实例。这是一个会自动创建图像的低、中、高分辨率版本的 Jquery 插件,呈现的版本取决于显示图像设备的分辨率和带宽。
在我们后边的 响应式图像教程 中,我们将详细讨论所有这些方法。
点击这里,在线查看演示。代码如下:
<!DOCTYPE html>
<html>
  <head>
    <title>Responsive image with HiSRC example with Bootstrap 3</title>
    <meta name="viewport" content="width=device-width, initial-scale=1.0">
    <!-- Bootstrap -->
    <link href="dist/css/bootstrap.min.css" rel="stylesheet" media="screen">
    <style>
    body {
    padding: 50px
    }
    img {
    margin-bottom:30px
    }
    </style>
    <!-- HTML5 Shim and Respond.js IE8 support of HTML5 elements and media queries -->
    <!-- WARNING: Respond.js doesn't work if you view the page via file:// -->
    <!--[if lt IE 9]>
      <script src="https://oss.maxcdn.com/libs/html5shiv/3.7.0/html5shiv.js"></script>
      <script src="https://oss.maxcdn.com/libs/respond.js/1.3.0/respond.min.js"></script>
    <![endif]-->
  </head>
  <body>
<img src="5216852563_eca0af1b0d_m.jpg" data-1x="5216852563_eca0af1b0d.jpg" data-2x="5216852563_90c3f9c402_o.jpg" class="hisrc" />
<!-- jQuery (necessary for Bootstrap's JavaScript plugins) -->
    <script src="https://code.jquery.com/jquery.js"></script>
    <!-- Include all compiled plugins (below), or include individual files as needed -->
    <script src="dist/js/bootstrap.min.js"></script>
<script>
$(document).ready(function(){
  $(".hisrc").hisrc();
});
</script>
<p>Photo courtesy: /http://www.flickr.com/photos/cubagallery/</p>
  </body>
</html>

